...
| Table of Contents | ||
|---|---|---|
|
Setting up reports - Administrators
Before semester and progress reports can be written, a series of steps must be taken to setup report writing. Mandatory steps include:
...
Reviewing the reporting settings through School Preferences. This page allows authorised staff to choose from a variety of settings such as; report templates, comment boxes and enabling work habit scores. It also allows the turning on of other features such as principal and student self-reflection comments.
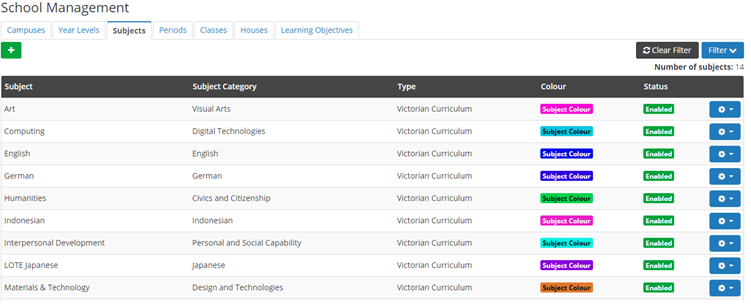
Creating Subjects
From the main menu Go to; Management -> School -> Subjects:
...
When done, click on the green ‘Create’ button at the bottom of the page.
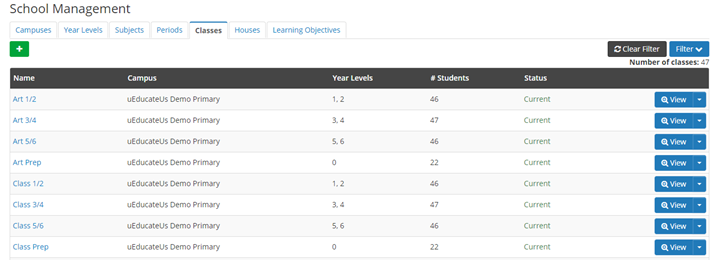
Creating Classes
Note: This step is optional, as the students’ classes should already exist on the system from the initial start-of-year setup. However, you may desire to have classes created for specialist subjects such as LOTE or Art. This is handy for specialist teachers as they can go in and mark only the scores and comments for the subject(s) they teach.
To create a class for managing specialist classes:
From the main menu Go to; Management -> School -> Classes.
...
Once the information has been input, click the green Continue button.
Modify Classes
After clicking the Continue button in the previous step, you will now find yourself on the Modify Class page. Here, you will need to add additional information about the class. This includes adding students and teachers to the class.
...
The specialist class has now been created with almost all its relevant information. The last step is to add the subject(s) to the class, which is covered in the next section.
Assigning Subjects to Classes
From the main menu Go to; Management -> School -> Classes.
Choose the class you want to edit and click on the down arrow to the right of the blue
...
Go back to: Modify Class button at the bottom of the page.
School Preference Settings for Reporting
From the main menu Go to; Management > Advanced > School Preferences.
Select the Reporting option from the menu on the left side of the Advanced Management page.
...
Note: While saving, you may have an error message appear on the page informing you to revise the comments you have made. If this occurs, simply look over the comments and fix any problems encountered based on the error messages provided for each comment.
Writing and managing reports – Administrators and teachers
All functionality for writing and managing semester and progress reports can be accessed from the main menu via Reporting > F-10.
...
Mark End of Semester Report
Click on the Mark End of Semester Report option:
...
Note: you will not be able to bulk write the comments for student reports through this option.
Mark Single Student
Once on the Mark Student Report page, you will have the option of marking the curriculum and work habits scores for the student, as well as writing comments.
...
e. To save your progress, click on the green Save button. Students who have had their scores saved will now be shaded in green on the ‘Mark Scores for Selected’ page.
...
Sample Comments:
Staff can create and manage their own comment banks through the Sample Comments section of reporting.
...
Once on the Sample Comments page you will be able to view the existing comments and create a new one.
Anyone can edit their own comments; administrative users can edit all comments.
Anyone can read the sample comments by clicking the blue View button to the right of the comment.
If you are the creator of the comment or an administrative user, you will also have the option of editing and deleting the comment through the blue cog button that is displayed after clicking the View button.
...
Create Sample Comment
Click on the Create Comment button.
...
i. Once all the information has been filled out, click on the ‘Create’ button at the bottom of the page.
Modify Sample Comment
Click on the View button to the right of a comment. When done, click on the blue cog button and select Edit.
...
Change the information displayed on the page. The options available are the same as on the create sample comment page.
When done, click on the Save button at the bottom of the page. Any changes made to the sample comment will not affect any existing semester and progress reports that make use of it.
Deleting Sample Comments:
Click on the ‘View’ button to the right of a comment. When done, click on the blue cog button and select ‘Delete’. Please note that the cog button will only appear if you are the author of the comment or an administrative user.
...
From within the Deleted comments tab, an administrator can restore a deleted comment for the use of all staff, or they can permanently delete it.
Restoring Sample Comments:
Click on the Deleted Comments tab.
...
A pop-up will appear asking you to confirm restoring the comment. To proceed, click on the Restore button.
...
Permanently Deleting Sample Comments:
Click on the Deleted Comments tab.
...
A pop-up will appear asking you to confirm this decision. Click on Delete and the comment will be removed permanently and cannot be recovered by an administrator.
...
Principal Comments:
Providing you are the principal for your school, you can write a personalised comment for each student’s report. Before writing these comments, you must ensure that principal comments are enabled in the system option settings:
From the main menu, go to -> Advanced > School Preferences
Click on the Reporting tab to the left of the page.
Click on the Semester Reports tab near the top of the page.
Select yes for Allow Principals to write their own comment for each student's report?

Click the Save button.
To write a principal comment:
Click on the Mark End of Semester Report button on the main Reporting page.
...
If you have created any sample comments under the type of Principal Comment, you will be able to add the comment into the comment box.
When done, click on the Save button. Your comment will now display on the student’s semester report.
Student Comments
A student comment is a self-reflectional comment by the student for the semester. These comments can be written by either the student or the main teacher for the class:
...
If not, click on the slider button to change its state. This setting will be automatically saved.
Providing you have the access to student comments, you can begin writing them by:
Click on the ‘Mark End of Semester Report’ button on the main Reporting page.
...
When done, click on the ‘Save’ button. The student’s comment will now display on their semester report.
Create Progress Report
Progress reports are an optional reporting method schools can use to allow reporting to parents in a more frequent and timely manner. Progress reports consist of a series of comments and/or scores marked by teachers that can be released to parents and students over the course of the semester.
To write a progress report comment:
Click on the ‘Create Progress Report’ button.
...
When ready to create the comment, click on the Save button.
Review existing comments:
While on the Mark Progress Report page, you will have the option to view and manage the comments that have been written for the student in their class. Simply click on the View button next to the relevant comment to display its content.
...
Edit – Allows you to change the comment and its relevant information. Please note that you will not be able to edit a comment if it has been disabled or approved for release to parents and students.
Disable – Locks a comment from being used in the student’s progress report.
Enable – Unlocks a disabled comment for use again.
Approving and Rejecting comments:
Depending on your access privileges, you will be able to approve or reject progress comments made or send them for approval to authorised users. To approve or reject comments for the student do the following:
...
Click on the ‘Approve or Reject’ button.
Sending comments for approval:
If you are a teacher with no special permissions, you will be able to send comments for approval by:
...
Note: While pending for approval, you will still be able to make changes to the comments.
Managing Subject Descriptors
Staff can write a comment description for a subject that will automatically appear on all student semester reports. This eliminates the need to write the same general subject descriptions on each individual student’s report. This section can be accessed by clicking on the ‘Subject Descriptors’ button on the main reporting page.
...
From the main menu go to: Management -> People -> Teachers.
Click on the blue cog button next the right of the relevant teacher and select Edit.
Scroll down to near the bottom of the page where you will see a list of permissions available to the teacher; Click on the checkbox for Can manage subject descriptors for reports.
...
Click the Save button.
Create a Subject Descriptor
When writing a subject descriptor, it is important to note that they will only appear on student reports for the year and semester it was written in. New subject descriptors are required to be written for each school semester.
...
When done, click the Create button.
...
Modify a Subject Descriptor
Changing a descriptor will affect all current semester reports that have not been approved.
...
Change the information provided. The details displayed are the same as on the create page.
Once changes have been made, click on the ‘Save’ button at the bottom of the page.
Delete a Subject Descriptor
Deleting a descriptor will remove it from all current semester reports that have not been approved.
...
A pop-up will appear asking you to confirm this decision. To proceed, click on the Delete button.
...
Viewing reports – Administrators and teachers
From the main menu, go to: Reporting > F-10
Note: Depending on your access privileges, you will also have the option to print, edit and approve reports.
...
Otherwise, click on the View Past Reports button to display all reports made for previous semesters:
...
View Report
Ensure you are on the right tab list located near the top of the page. End of Semester reports will display under the Semester Reports tab. Click on Progress Reports if you wish to view student progress reports.
...
You can also view specific scores and comments for a subject through the selection of the dropdown located near the top of page. This dropdown will appear no matter the type of report you are viewing.
Print Reports
By default, any staff member can print an approved report for a past semester. However, only administrators can print current reports that have not been approved. An administrator can turn printing current reports on for teachers by doing the following:
...
To print a single student report, click on the blue cog button and selecting ‘Print’.
...
To print multiple student reports at once:
Click on the Print Reports button near the top of the page.
...
Note: This functionality relies on the PDF reports to exist on the system’s provided servers, which are automatically generated as staff write and approve reports. If these reports have not been created yet, you will be brought to a waiting page instead. Once all the reports have been generated, your browser will automatically display or download the file for you.
Modify Reports
While viewing student reports, you may wish to make a quick change to it. Rather than going back to the main reporting page, you can alternatively edit the report through the View Current Reports section. Please note that once a report has been approved by an authorised user, it cannot be edited until it has been rejected and sent back to Draft status by an authorised user.
Reports can also be edited through the View Past Reports section, providing that the past report is for the current year. All reports for previous years cannot have their results changed, even if they are still in Draft status.
To make a change to a student’s report:
Click on the View Current Reports button from the main reporting page:
...
Note: Changes made to individual classes must be saved separately.
Approve Semester Reports
Approving semester reports will allow students and their parents to view their report. When a report is approved, it cannot be edited by a staff member.
...
Those staff who do not have permission to approve semester reports will instead be able to send their reports for approval to authorised users.
Approve or Reject Semester reports
If you are authorised to approve or reject semester report comments, you can do so by:
...
Click the Send for Approval button, which will send a notification to authorised users to review the reports. While the reports are pending approval, you will still be able edit the reports.
Approve Progress Reports
Approving progress report comments will allow students and their parents to view the comments written by teachers. When a comment is approved, it cannot be changed by a staff member. However, additional comments can be created and released for the same reports if the comment falls under the same time range.
...
Note: While pending for approval, you will still be able to make changes to the comments.
EXPORT REPORTING DATA - Administrators
uEducateUs provides the ability to export the curriculum scores for semester reports. These scores can be downloaded as either an excel file or an XML file for uploading into Cases21.
...
If the report scores you are trying to export do not exist based on the previous options selected or there is missing data on the system, an error message will appear on the page. The error outlined must then be corrected before attempting to generate another export file.
Viewing reports – Parents and students
You will be able to view any approved reports directly through the Reporting link from the main menu.
...
View/Print Reports
Note: Currently, you cannot print reports from within the uEducateUs mobile applications. To print reports, you must be viewing the reports in the uEducateUs system via a web browser.
...